
The Batch Orders Screen was developed to allow the rapid entry of a subset of orders from a single pickup (Outbound) or delivery (Inbound) location from within a pool of possible addresses. It is used in conjunction with order templates.
Batch order entry can be used within CMS and within web remote.
Initial Setup
Before using batch order entry, there will need to be one order template for each potential delivery address. See our article on Type 1 templates for more information on how to create a template.
Leave the Frequency tab of the template completely blank. The customer's address must be in the pickup stop for Outbound deliveries or in the delivery stop for Inbound deliveries.
Batch order entry screen
The batch order entry screen for CMS is in Orders & Dispatch > Batch Order Entry.
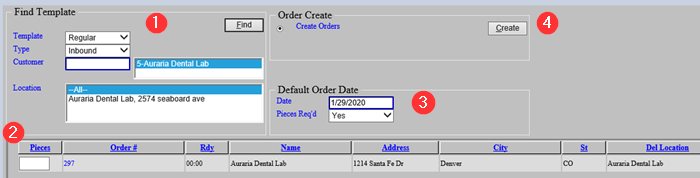
Find Template frame - Lookup tools to select the desired template for the process.
Results frame - List of templates matching the selected criteria.
Default Order Date frame - The date for the resulting orders.
Find Template
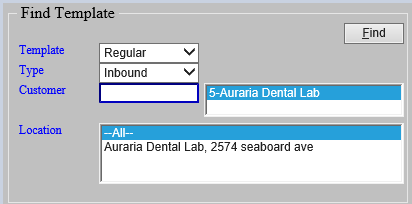
Fill in the following fields as needed, then click the Find button to location matching templates.
Template - Select the kind of template to be used. Most likely is "Regular."
Type - Select one of the following options:
Inbound - Templates with the desired customer's address in the Destination frame.
Custom Inbound - Will display a new Name field. Enter the desired name to display all templates with that matching name in the Destination frame > Name field.
Outbound - Templates with the desired customer's address in the Pick Up frame.
Custom Outbound - Will display a new Name field. Enter the desired name to display all templates with that matching name in the Pick Up frame > Name field.
Route In/Out - Will display a new Route field. Enter the desired route number.
Customer - Enter a customer account number and press the Tab key to search for templates matched with those customer(s).
Location - Will display all locations that match with the above entries. User can select --All-- or one or more of the listed addresses. To select multiple rows, hold down the Ctrl key while clicking each row.
Default Order Date
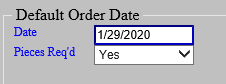
Enter the desired date for the orders to be created and select whether pieces are required.
Note: If the Date in this field with the Ready Time of the resulting template is before the current date and time, pieces will not be able to be entered. Either the above Date field or the Ready Time of the template would need to be changed in order to enter pieces.
Results
All templates that match the criteria in the Find Template frame will display in a list, along with a Pieces text box (unless there is a date mismatch; see Note in above section). For Inbound, the list will show stop 1 of the template, provided the stop is a pickup. For Outbound, the list will show stop 2 of the template, provided the stop is a delivery. In both cases, it will show all templates of type 1 for the selected customer as long as the Frequency tab of the template is empty.
Type the total number of pieces in the Pieces box and tab out; new rows for each piece will appear below.

Fill in the ID, description, and weight for each piece. Any other fields that are required for order entry in your system will appear at the bottom and must also be filled in.
When finished and certain that all fields are correct, click the "Create" button in the upper right-hand corner.
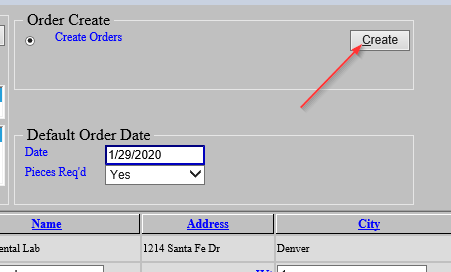
A popup will appear to confirm the number of orders and pieces; click "Yes" to continue or "No" to make changes.
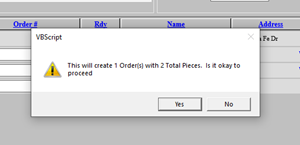
When finished, the Pieces column will be replaced with the word Processed. Click the Processed link to open the new order in order entry, or click the number in the Order # column to open the original template.

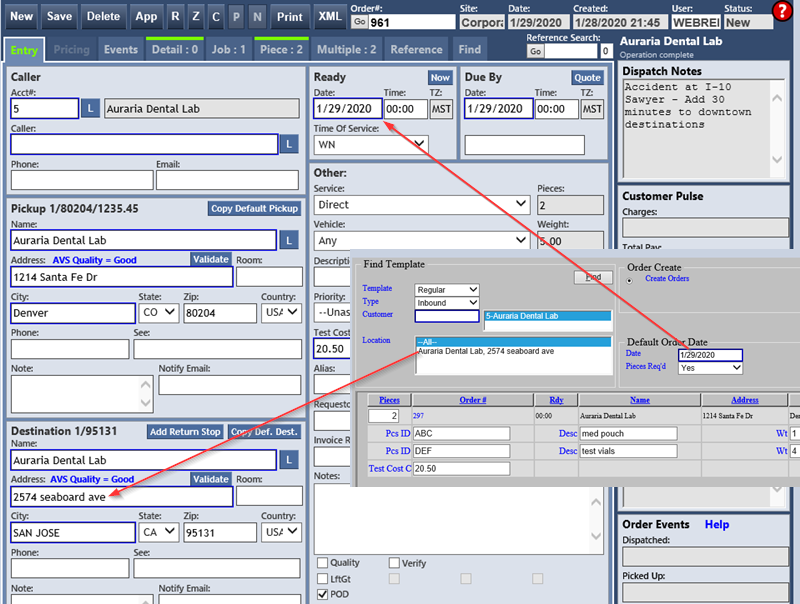
In the resulting order, as expected for an Inbound entry, the address in the Destination field matches the criteria that we put at the top of the batch order entry screen, set to be ready on the order date we entered.
Add to Web Remote
The batch order entry screen can be made available to web remote users. The functionality is very similar, but with a few exceptions to reduce the likelihood of error:
Web remote user will not be able to specify a template type; the system will assume only Regular templates.
Custom Inbound and Custom Outbound will not be options in the Type combobox.
The user can only create orders for a customer account that is linked to their web remote user profile.
To add batch order entry to the web remote menu, in CMS go to Remote > Web Sidebar and do the following:
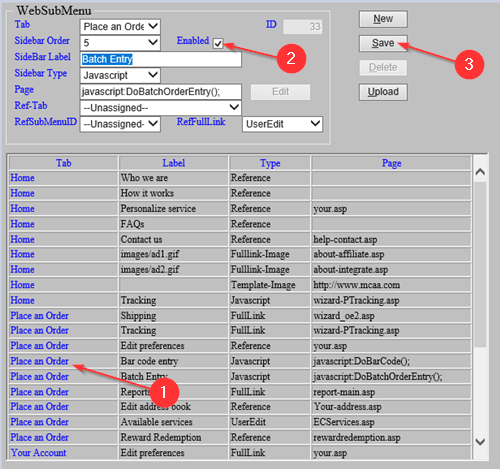
Select the row for "Batch Entry"
Check the Enabled checkbox
Click Save
Next, make it available for all desired users. In CMS, go to Remote > Remote User, then for each desired web remote user:
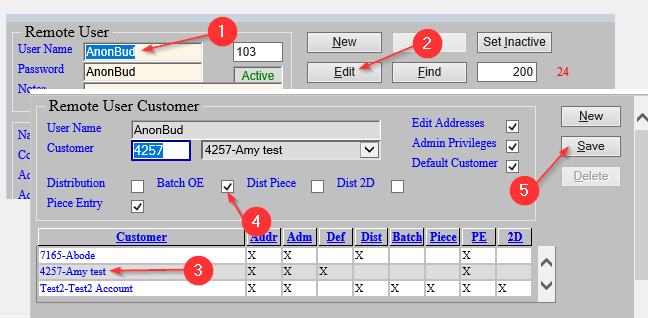
Find and select the desired user.
Click the "Edit" button.
In the new window's Remote User Customer frame, select an account attached to that user
Check the Batch OE checkbox
Click "Save"
Repeat steps 3-5 for all desired customer accounts under that remote user, then close the popup window and click "Save" in the main Remote User screen.
The next time this web user logs into web remote, the Batch Entry link will be in their sidebar and would take them to a batch order entry screen similar to the one detailed in the above section.